Create webhooks
Let's create a webhook in the Campaign Manager to send some data from Talon.One. The objective is to simulate how we can trigger an email sent by an external platform.
Let's use Webhook.site as the recipient of our webhook. Webhook.site allows us to inspect the content of our webhook.
We want to send the following data:
- Three attributes: The customer's email and name, and the integration ID of the session.
- Two parameters: The body text of the email and the API key for authentication.
We highly recommend that you read about webhooks and defining their payload before following this tutorial.
- If you prefer sending the data from Talon.One as an effect, create a custom effect instead.
- To create and manage webhooks, ensure you are the admin or Application admin for every Application the webhook is connected to.
Create the webhook
Let's create our webhook:
-
Open Webhook.site and, from the Your unique URL section, click Copy to clipboard. Save the copied URL for use in step 5.
-
In the Campaign Manager, click Account > Tools > Webhooks > Create Webhook.
-
In Name, type
My webhook test. -
In Connected Applications, select the Applications where you want the webhook to be available.
-
In Request details, set the Verb and URL as follows:
- Verb: POST
- URL: Enter the Webhook.site URL you copied in step 1.
-
In Headers, add the following header that references the
APIkeyparameter in the header:- Key:
Authorization - Value:
ApiKey-v1 ${$APIkey}
- Key:
-
In Parameters, create the following parameters for the request:
- Recipient name:
- In Type, select String.
- In Name, enter
${$Profile.Attributes.Name}. - In Description, enter
The name of the recipient..
- Email address:
- In Type, select String.
- In Name, enter
${$Profile.Attributes.Email}. - In Description, enter
The email address..
- Session integration ID:
- In Type, select String.
- In Name, enter
${$Session.IntegrationId}. - In Description, enter
The session integration ID..
- Body text of the email:
- In Type, select String.
- In Name, enter
${$bodyText}. - In Description, enter
The body of the email.
- Recipient name:
-
In the Payload section, enter the following payload:
JSON webhook payload{
"name": "${$Profile.Attributes.Name}", //references a custom attribute
"email": "${$Profile.Attributes.Email}", //references a custom attribute
"session_integrationId": "${$Session.IntegrationId}", //references a built-in attribute
"body": "${$bodyText}" //references a parameter whose value is set in the webhook effect
} -
In the Test section, click Test Webhook.
noteCurrently, webhook tests always return Unsuccessful, regardless of the webhook's configuration. However, you can still create the webhook after running the test.
-
Click Create Webhook.
The webhook is created. Let's use it in a rule.
Create the rule that uses the webhook
-
In the Campaign Manager, in a standard campaign, create a rule.
-
Choose a condition.
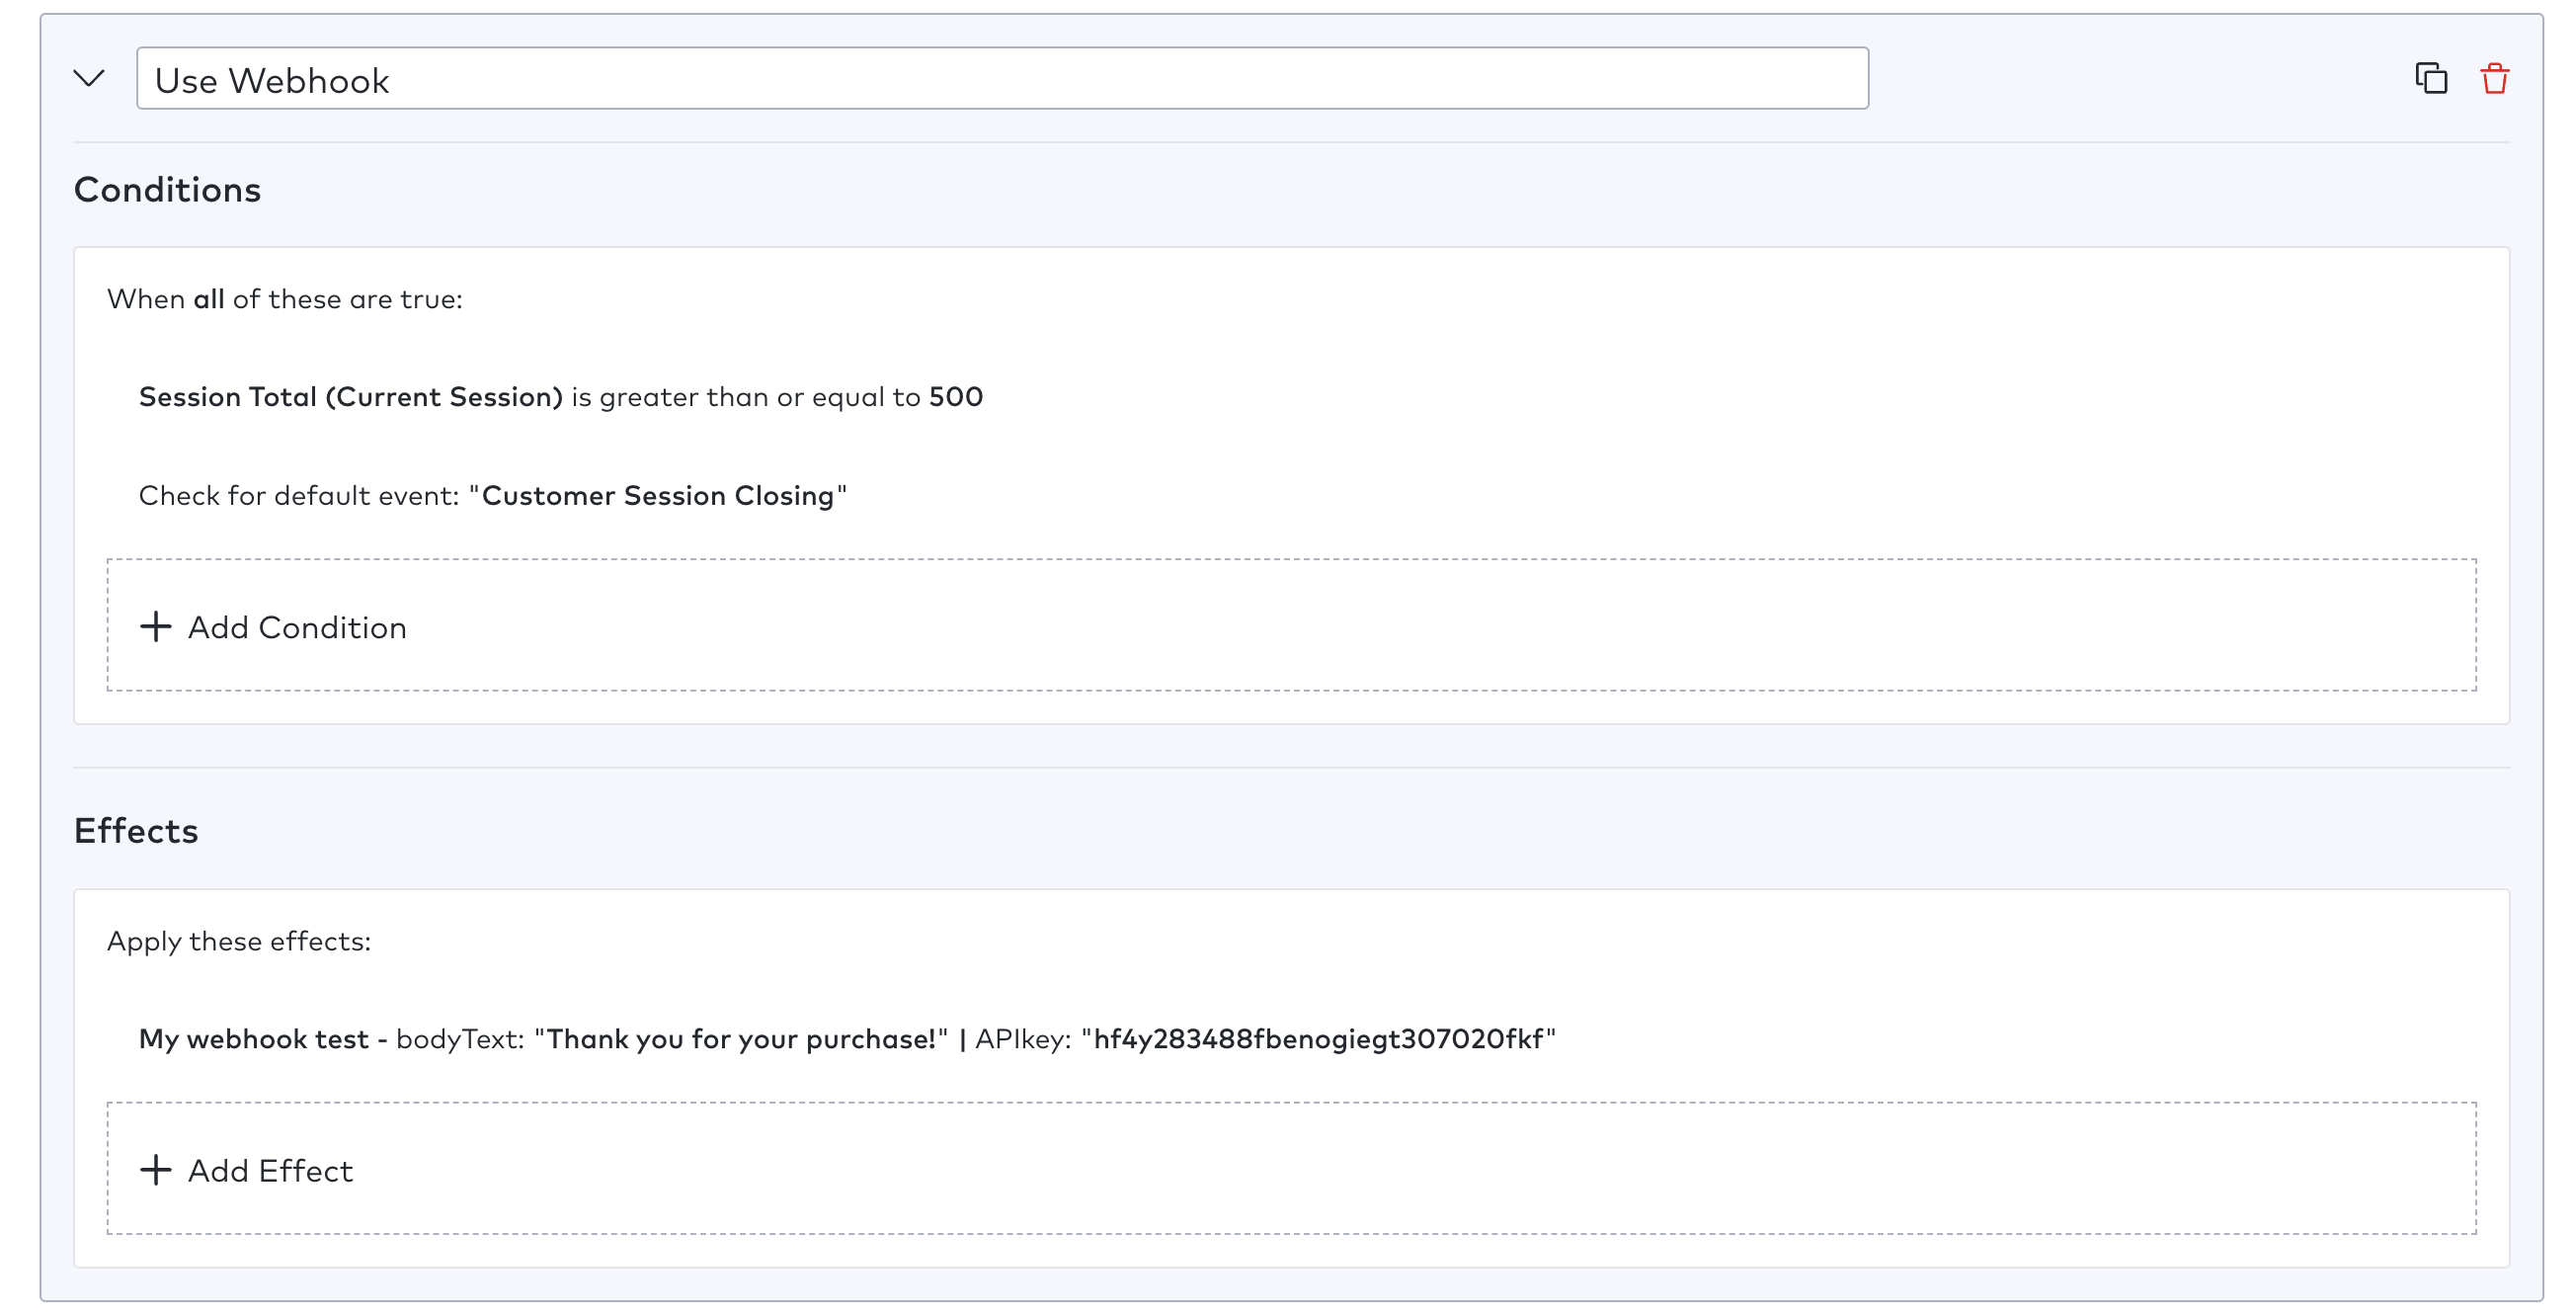
In our case, we can imagine we want to trigger an email when the customer spends $500. We can use
Session total > 500andEvent Type = Customer Session Closing. -
Click Add effect and select Webhook: My webhook test. Our webhook has two parameters.
- In
bodyText, enterThank you for your purchase!. - In
APIkey, enterhf4y283488fbenogiegt307020fkf.
- In
-
Save the rule and activate the campaign.

Now, every time a session whose total is greater than $500 gets closed, Webhook.site receives a request containing the following body:
{
   "name": "<name of the customer>",
   "email": "<email address of the customer>",
   "session_integrationId": "<the session id set from the integration layer>",
   "body": "Thank you for your purchase!"
}