Create a webhook to Iterable
In this tutorial, let's use a webhook in Talon.One to trigger an email campaign in Iterable.
Let's imagine we want to retrieve an existing coupon code from Talon.One and pass it to Iterable. The Iterable campaign should then email the coupon code to the target user.
Talon.One requirements
- You are an admin user.
- You have set up an Application.
- Your Application contains a running campaign with the Coupons feature enabled.
- You have added coupons to the campaign.
You can edit the default format of the coupon codes in the campaign's Settings section.
Iterable requirements
- You have set up your Iterable account.
- You have added users to your Iterable project.
Your user data includes the user's first name and a user ID. For this tutorial, we assume the corresponding fields are named
firstNameanduserId.
Set up the integration
Create a triggered campaign in Iterable
To create a campaign that can be triggered from Talon.One, let's first create an email template in Iterable:
-
In Iterable, open Content > Templates.
-
Click New Template > Email.
-
Enter a name and click Create template.
-
In Details, click Edit details and enter at least a subject for the email.
-
In Design, click Edit design. When asked, choose the WYSIWYG editor.
-
Use the following example to create your email template:
Hi {{firstName}},

Thank you for your recent purchase.

Use {{couponCode}} to get 10% off your next purchase over $20.

To unsubscribe from these emails, click {{unsubscribeUrl}}.tipIn the example above, we use double curly braces
{{...}}for user profile and event fields and merge parameters.When the campaign is triggered and the email template is sent, these placeholders are populated with values from Iterable and Talon.One.
Now, we can create a triggered campaign based on that template. To do so:
- In Iterable, open Messaging > Campaigns.
- Click New Campaign > Email.
- In Campaign name, enter a name.
- In Type, choose API-Triggered, and click Create campaign.
- In Content, click Browse templates and select the template you created.
- Click Done to close the template dialog.
- Click Review, Activate.
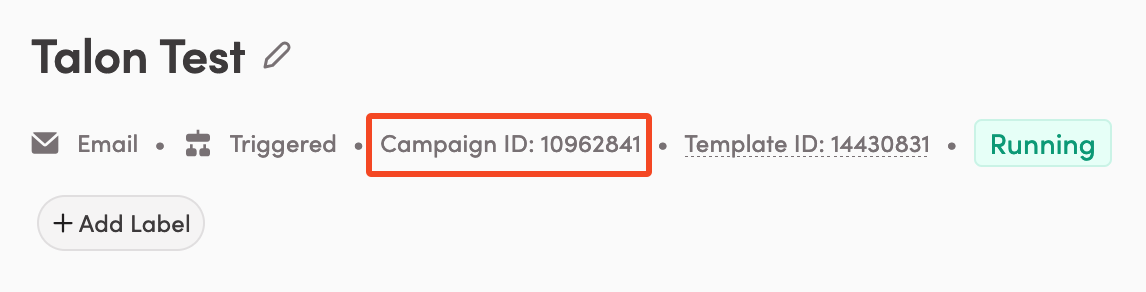
The state of the campaign is now Running. - Make a note of the ID of your campaign.
Create an API key in Iterable
- Click Integrations > API Keys > New API key.
- Enter a name and click Create API key. Save the key value for later use.
Create a webhook in Talon.One
Using a webhook, we can now trigger the campaign we created. Talon.One provides two kinds of webhooks:
Use a webhook template
For basic integration use cases, Talon.One provides a Send coupon webhook template.
When using the template, the webhook payload is pre-populated with data expected by Iterable: campaign ID, recipient user ID, and coupon code.
To create a webhook based on the Iterable template:
- Open Account > Integrations > Iterable.
- Ensure the Connection Details section is up to date with:
- Base URL: The base URL of the Iterable API.
- API Key: The API key you created.
- Click Create Webhook > Send coupon.
- Enter a name and select the Applications in which the webhook should be available.
After you save the webhook, you can use it to trigger Iterable emails.
Use a custom webhook
For advanced integration use cases, you can create a custom webhook to Iterable:
For demonstration purposes, the instructions below replicate the Send coupon webhook template. You can use this as a starting point for creating your own custom webhook.
-
In the Campaign Manager, click Account > Tools > Webhooks and click Create Webhook.
-
Enter a name and select the Applications in which the webhook should be available.
-
Add the parameters to include in the request. In this tutorial, we'll use the following parameters:
Param type Param name numberIterableCampaignIDstringCustomerProfileIDstringCouponCode -
In Request, set Verb to POST.
-
In URL, enter
https://api.iterable.com/api/email/target. -
In Headers, click Add and define the following header:
Api-Key: YOUR_API_KEY, whereYOUR_API_KEYis the API key you created. -
In Payload, add the request payload. In this tutorial, we'll use the following payload:
{
  "campaignId": ${$IterableCampaignID},
  "recipientUserId": "${$CustomerProfileID}",
  "dataFields": {
    "couponCode": "${$CouponCode}"
  }
}tipTo learn more about accessing Talon.One attributes and including them in the webhook, see Use parameters in the webhook payload.
After you save the webhook, you can use it to trigger Iterable emails.
Trigger Iterable emails
We can now trigger Iterable emails via the Rule Builder. To do so, open your campaign and create a rule with the following logic:
- Condition: Coupon code is valid
- Effect: In the Webhooks section, select the webhook you created, and make the following settings:
- In IterableCampaignId, type the ID of the Iterable campaign you created.
- In CouponCode, select the Coupon Code (Coupon) attribute.
- In CustomerProfileID, select the Integration ID (Customer Profile) attribute.
Now, every time the rule is valid, the effect triggers Iterable to send an email with the coupon code to the current customer.
You can trigger the rule, for example, by opening a customer session
that includes a customer integration ID and a coupon code. If the integration ID matches the userId of an existing user in Iterable, an email is sent to that user.